Use WorkBuddy with Models Hub: Custom Model in Settings
Add a custom model in WorkBuddy (CodeBuddy IDE) settings, fill in the Models Hub endpoint and API key to start chatting, with recommended models, verification, and error troubleshooting.
WorkBuddy is the AI coding assistant inside Tencent Cloud's CodeBuddy IDE. It lets you add custom models straight from the settings UI, using the OpenAI-compatible interface format — no config files to edit. Point the endpoint at Models Hub and the chat panel uses your Models Hub balance for the model you choose.
Three things you need
A Models Hub API key, the base URL https://modelsok.com/v1, and a model name. Everything is done in the settings UI — no configuration files involved.
Prerequisites
- WorkBuddy / CodeBuddy IDE installed and signed in.
- A Models Hub API key, created on the Tokens page. The token's group must have access to the models you plan to use.
Recommended models
| Use case | Model | Pricing | Live status |
|---|---|---|---|
| Everyday coding | claude-sonnet-4-6 | Price | Availability and latency |
| Harder reasoning and long context | gpt-5.5 | Price | Availability and latency |
| Cheap and fast for small edits | gpt-5.4-mini | Price | Availability and latency |
Model names are authoritative on the pricing page.
Setup
Step 1 — Open the custom model dialog
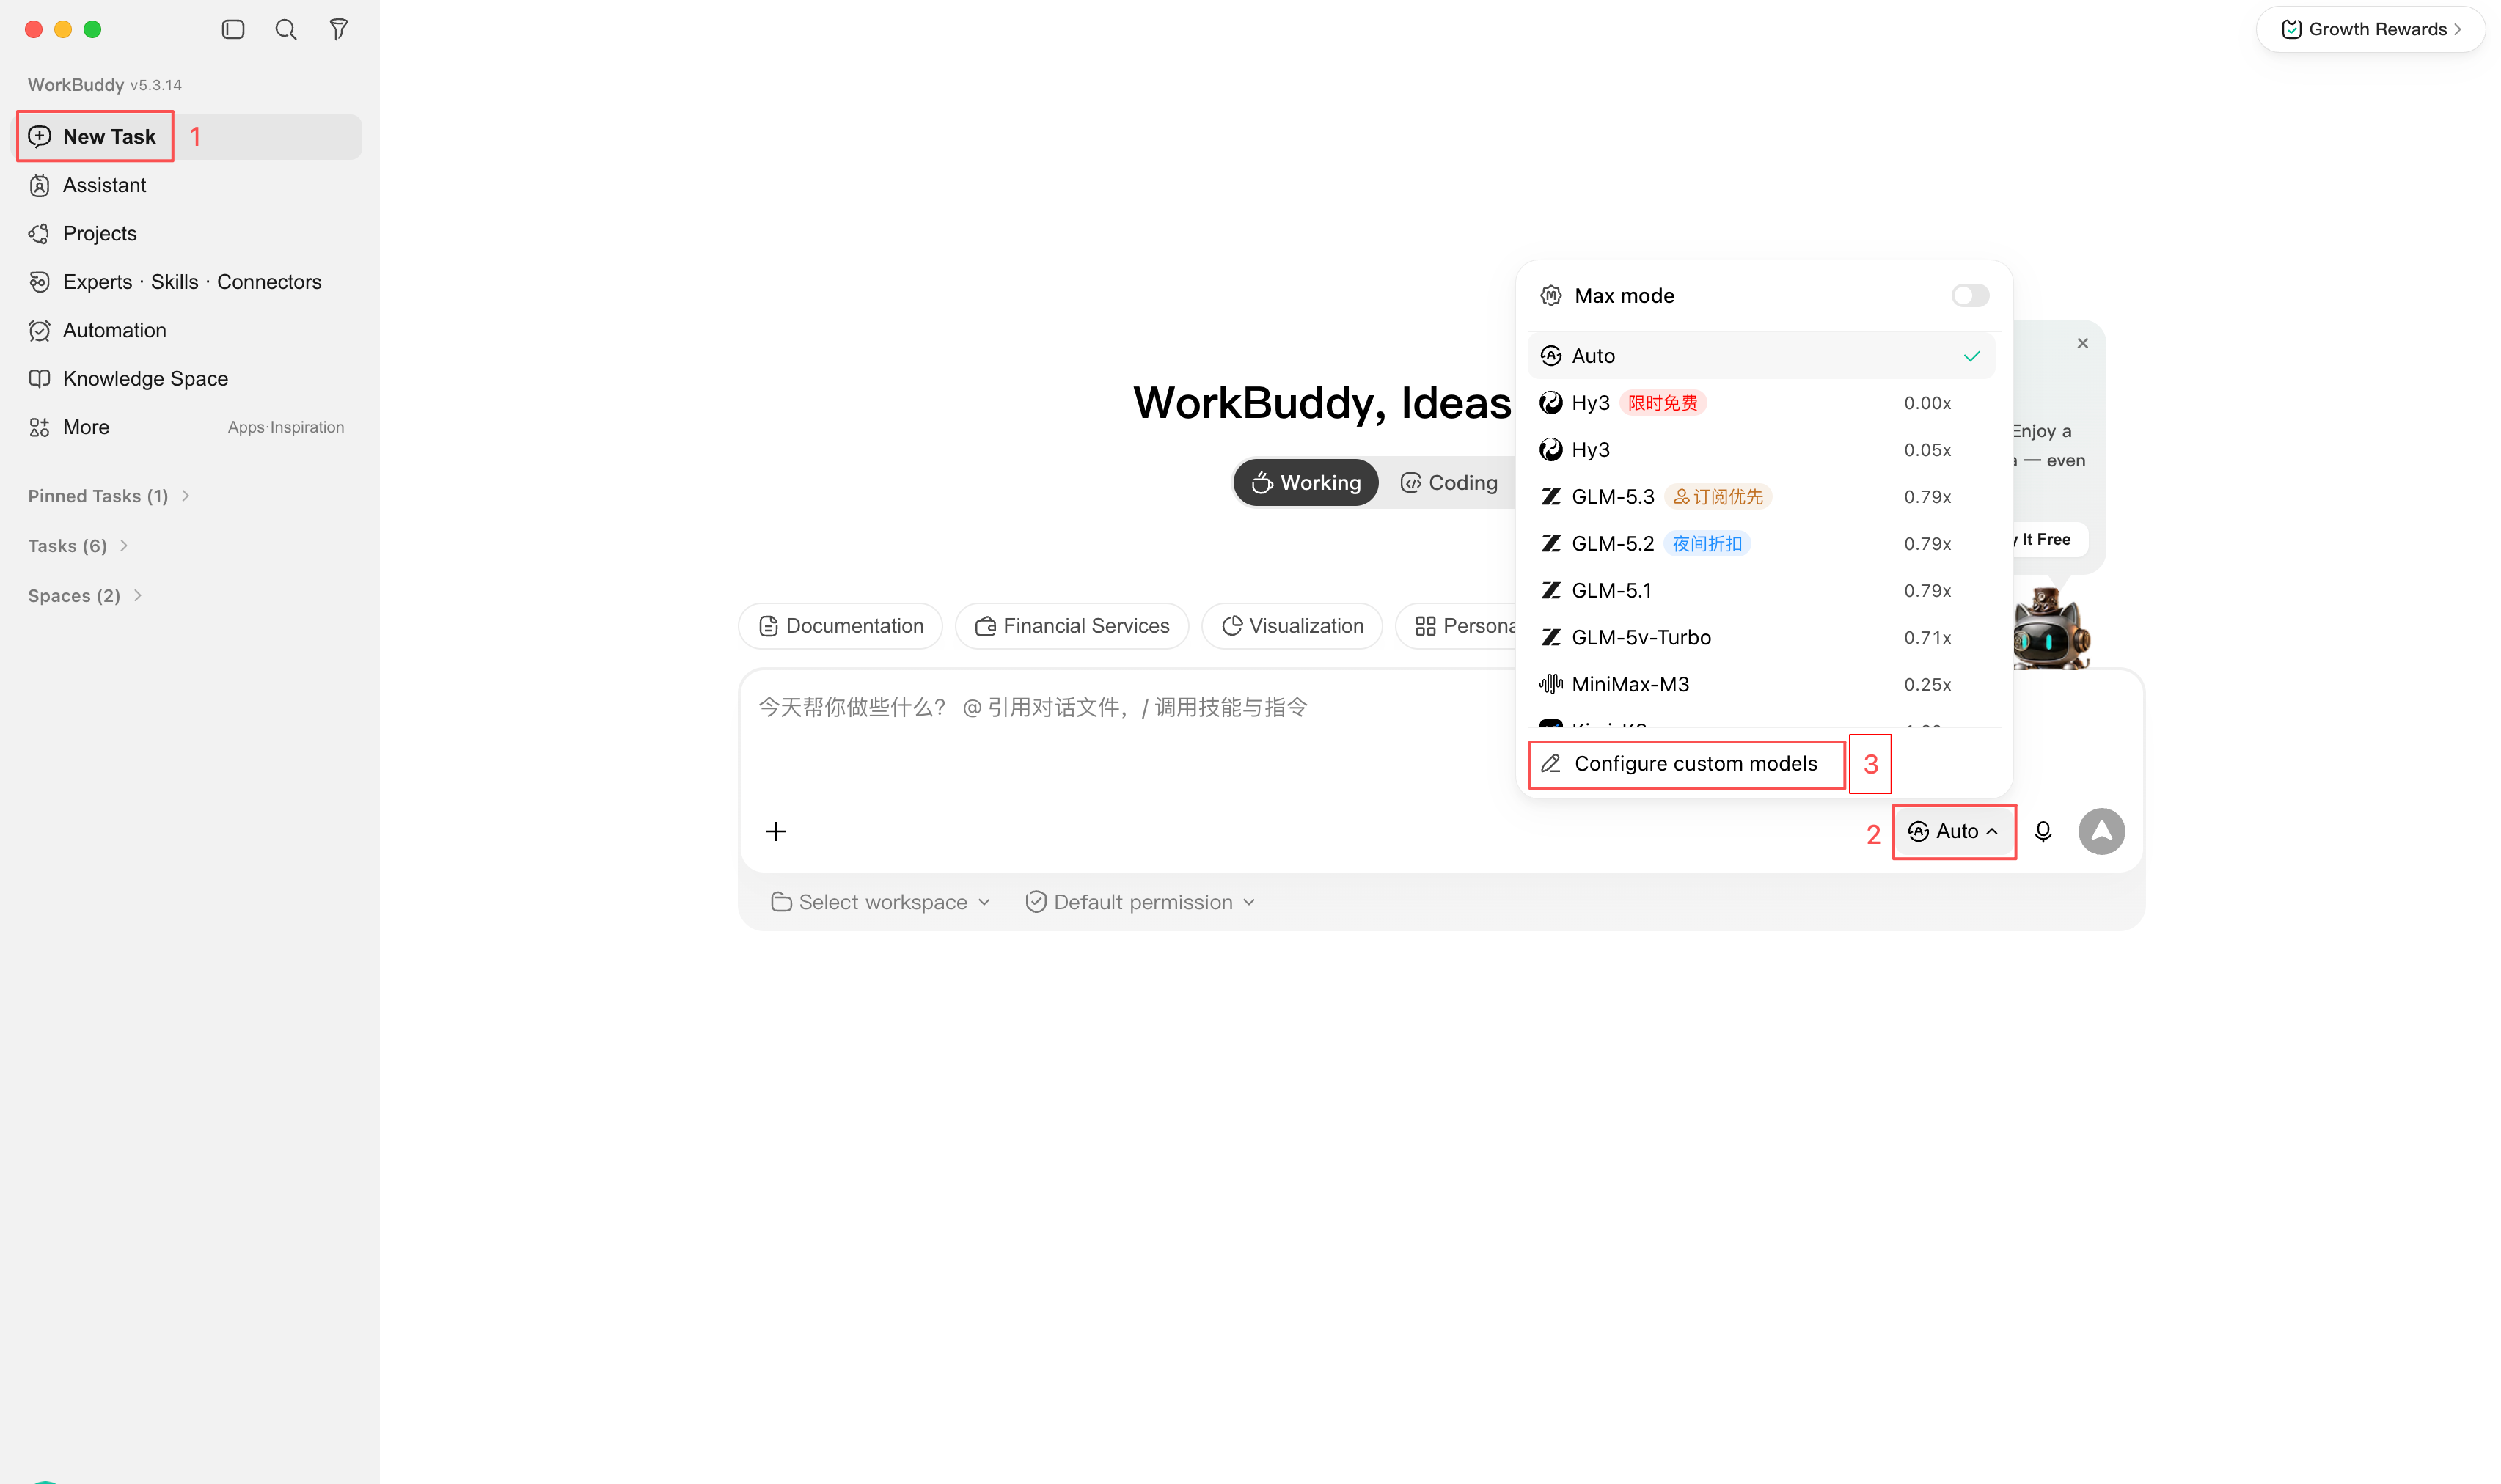
Sign in to WorkBuddy, click New task in the left sidebar, then click the model selector at the bottom-right of the chat panel (it shows Auto by default). At the bottom of the menu, choose Configure custom models.
Step 2 — Pick the custom provider type
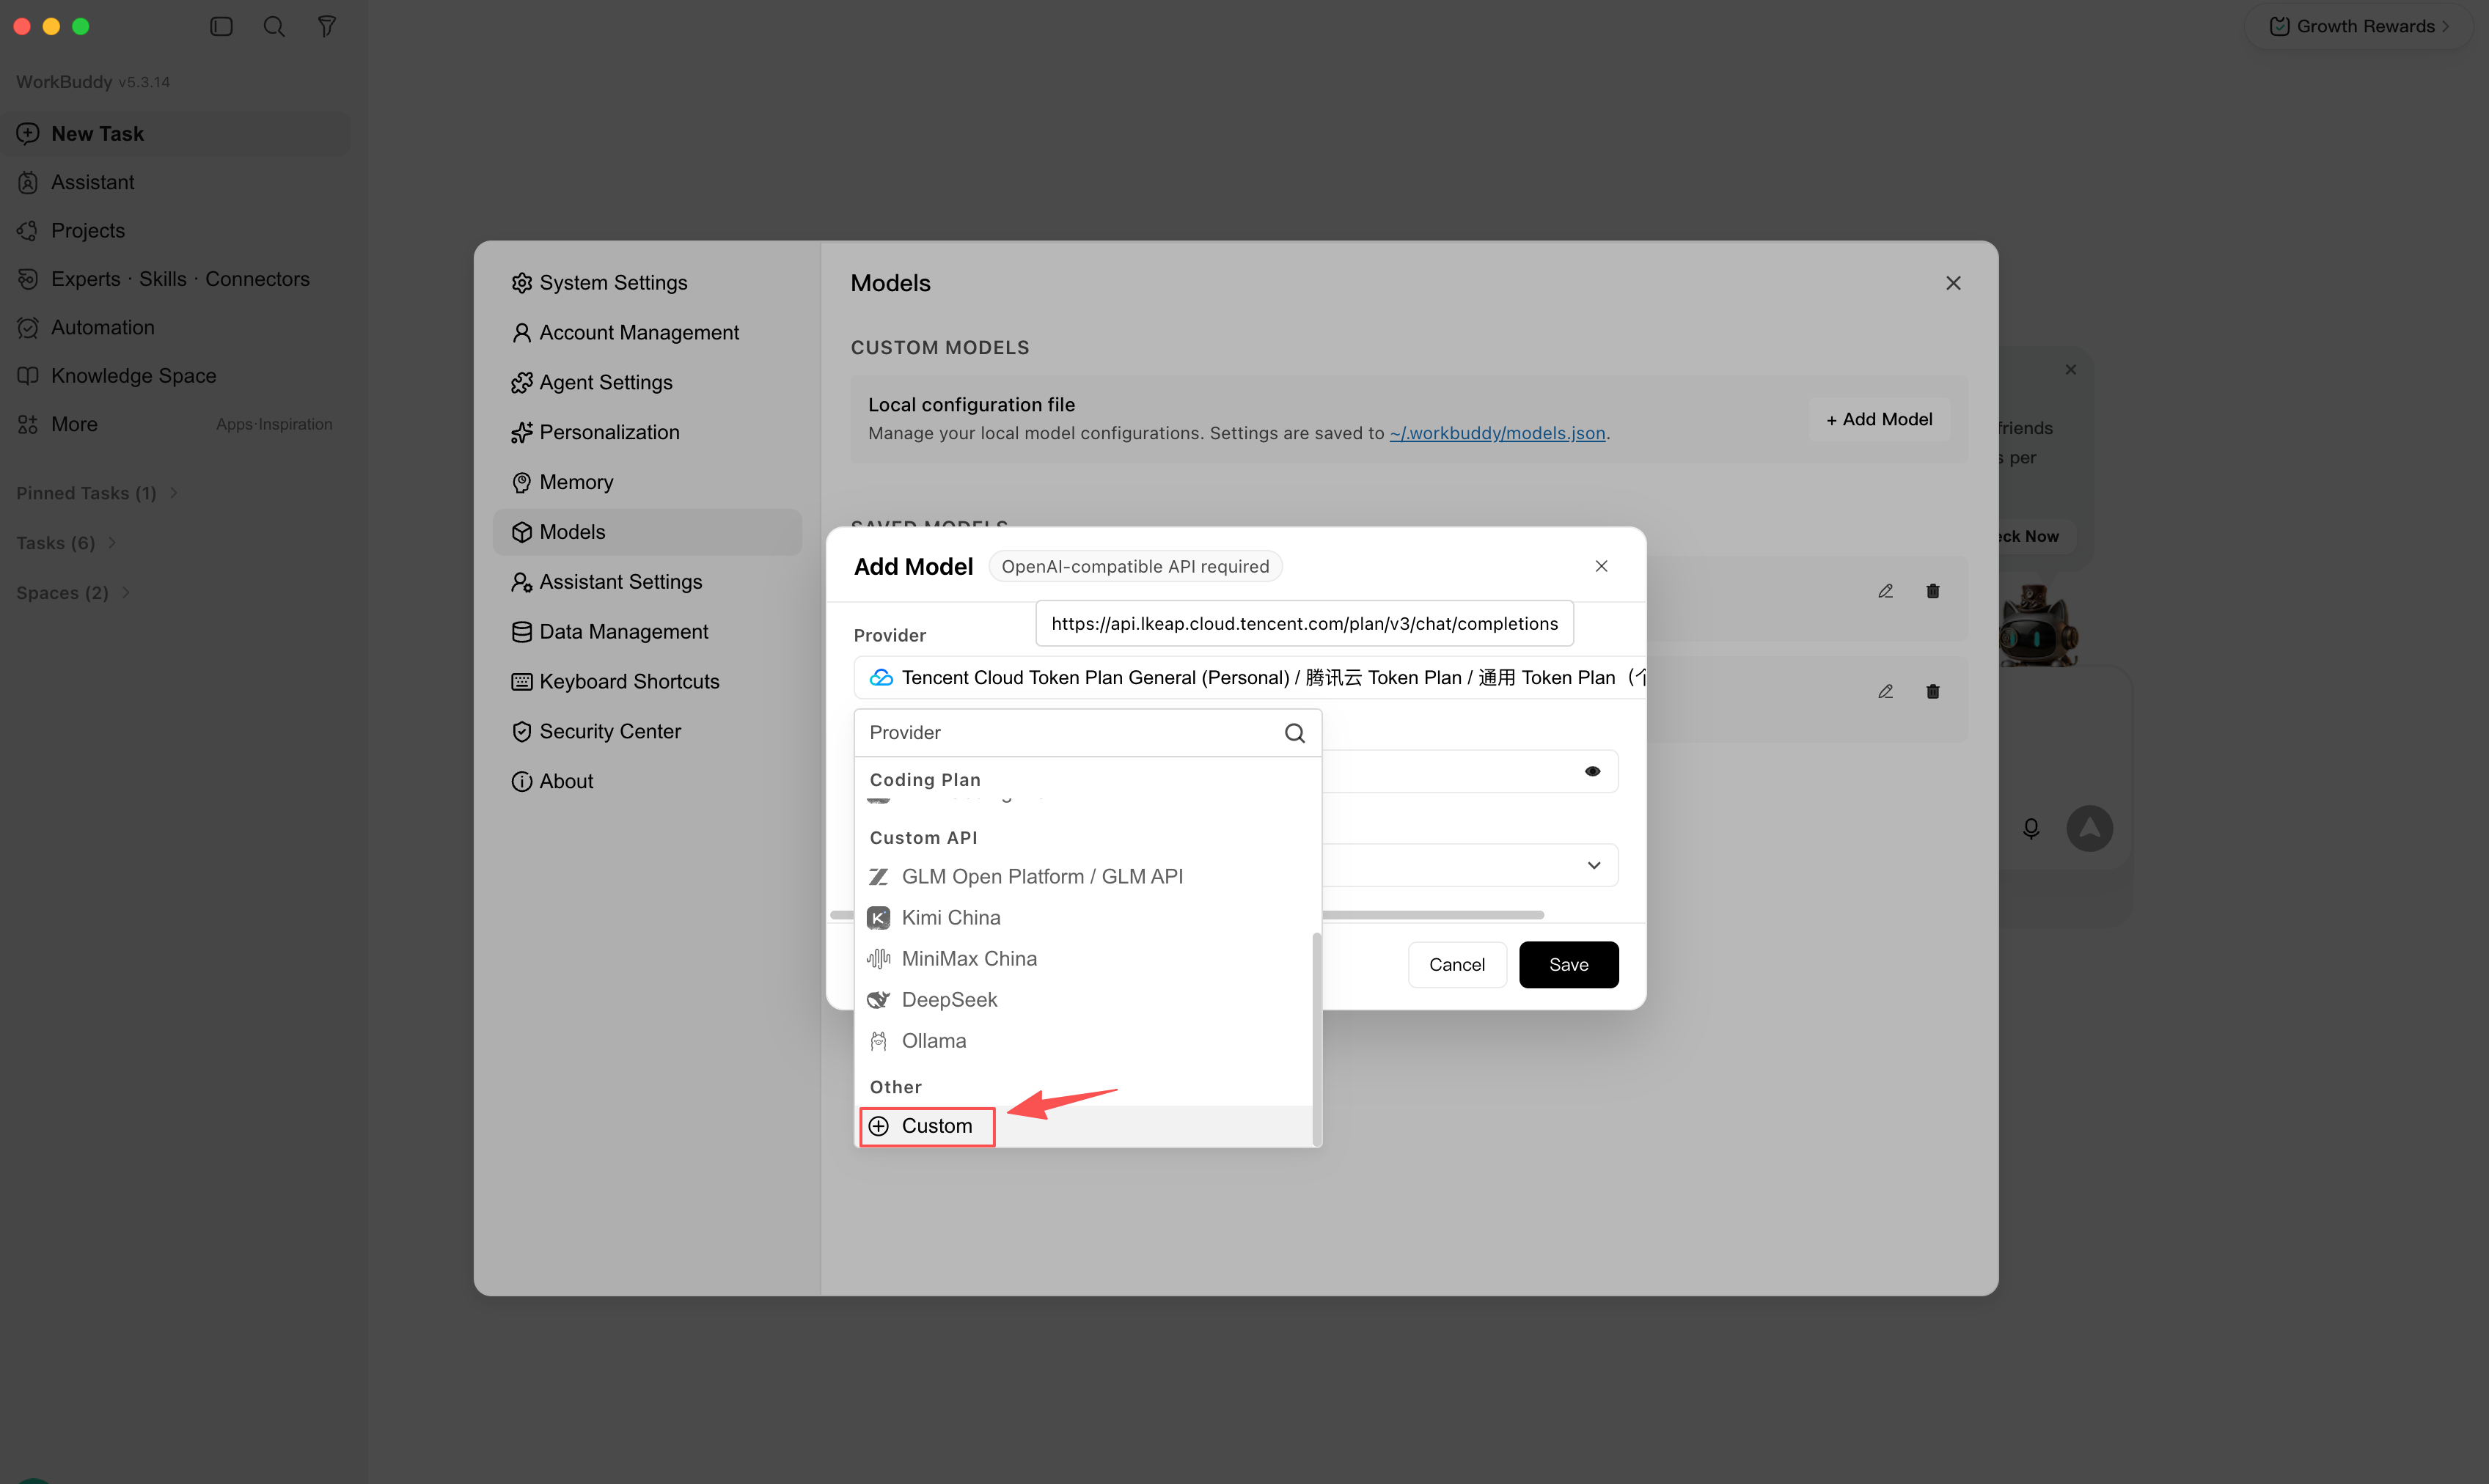
Go to Settings → Model and click Add model. In the Add model dialog, change the Provider dropdown to Custom / 自定义 under the Other group.
Step 3 — Fill in the configuration and save
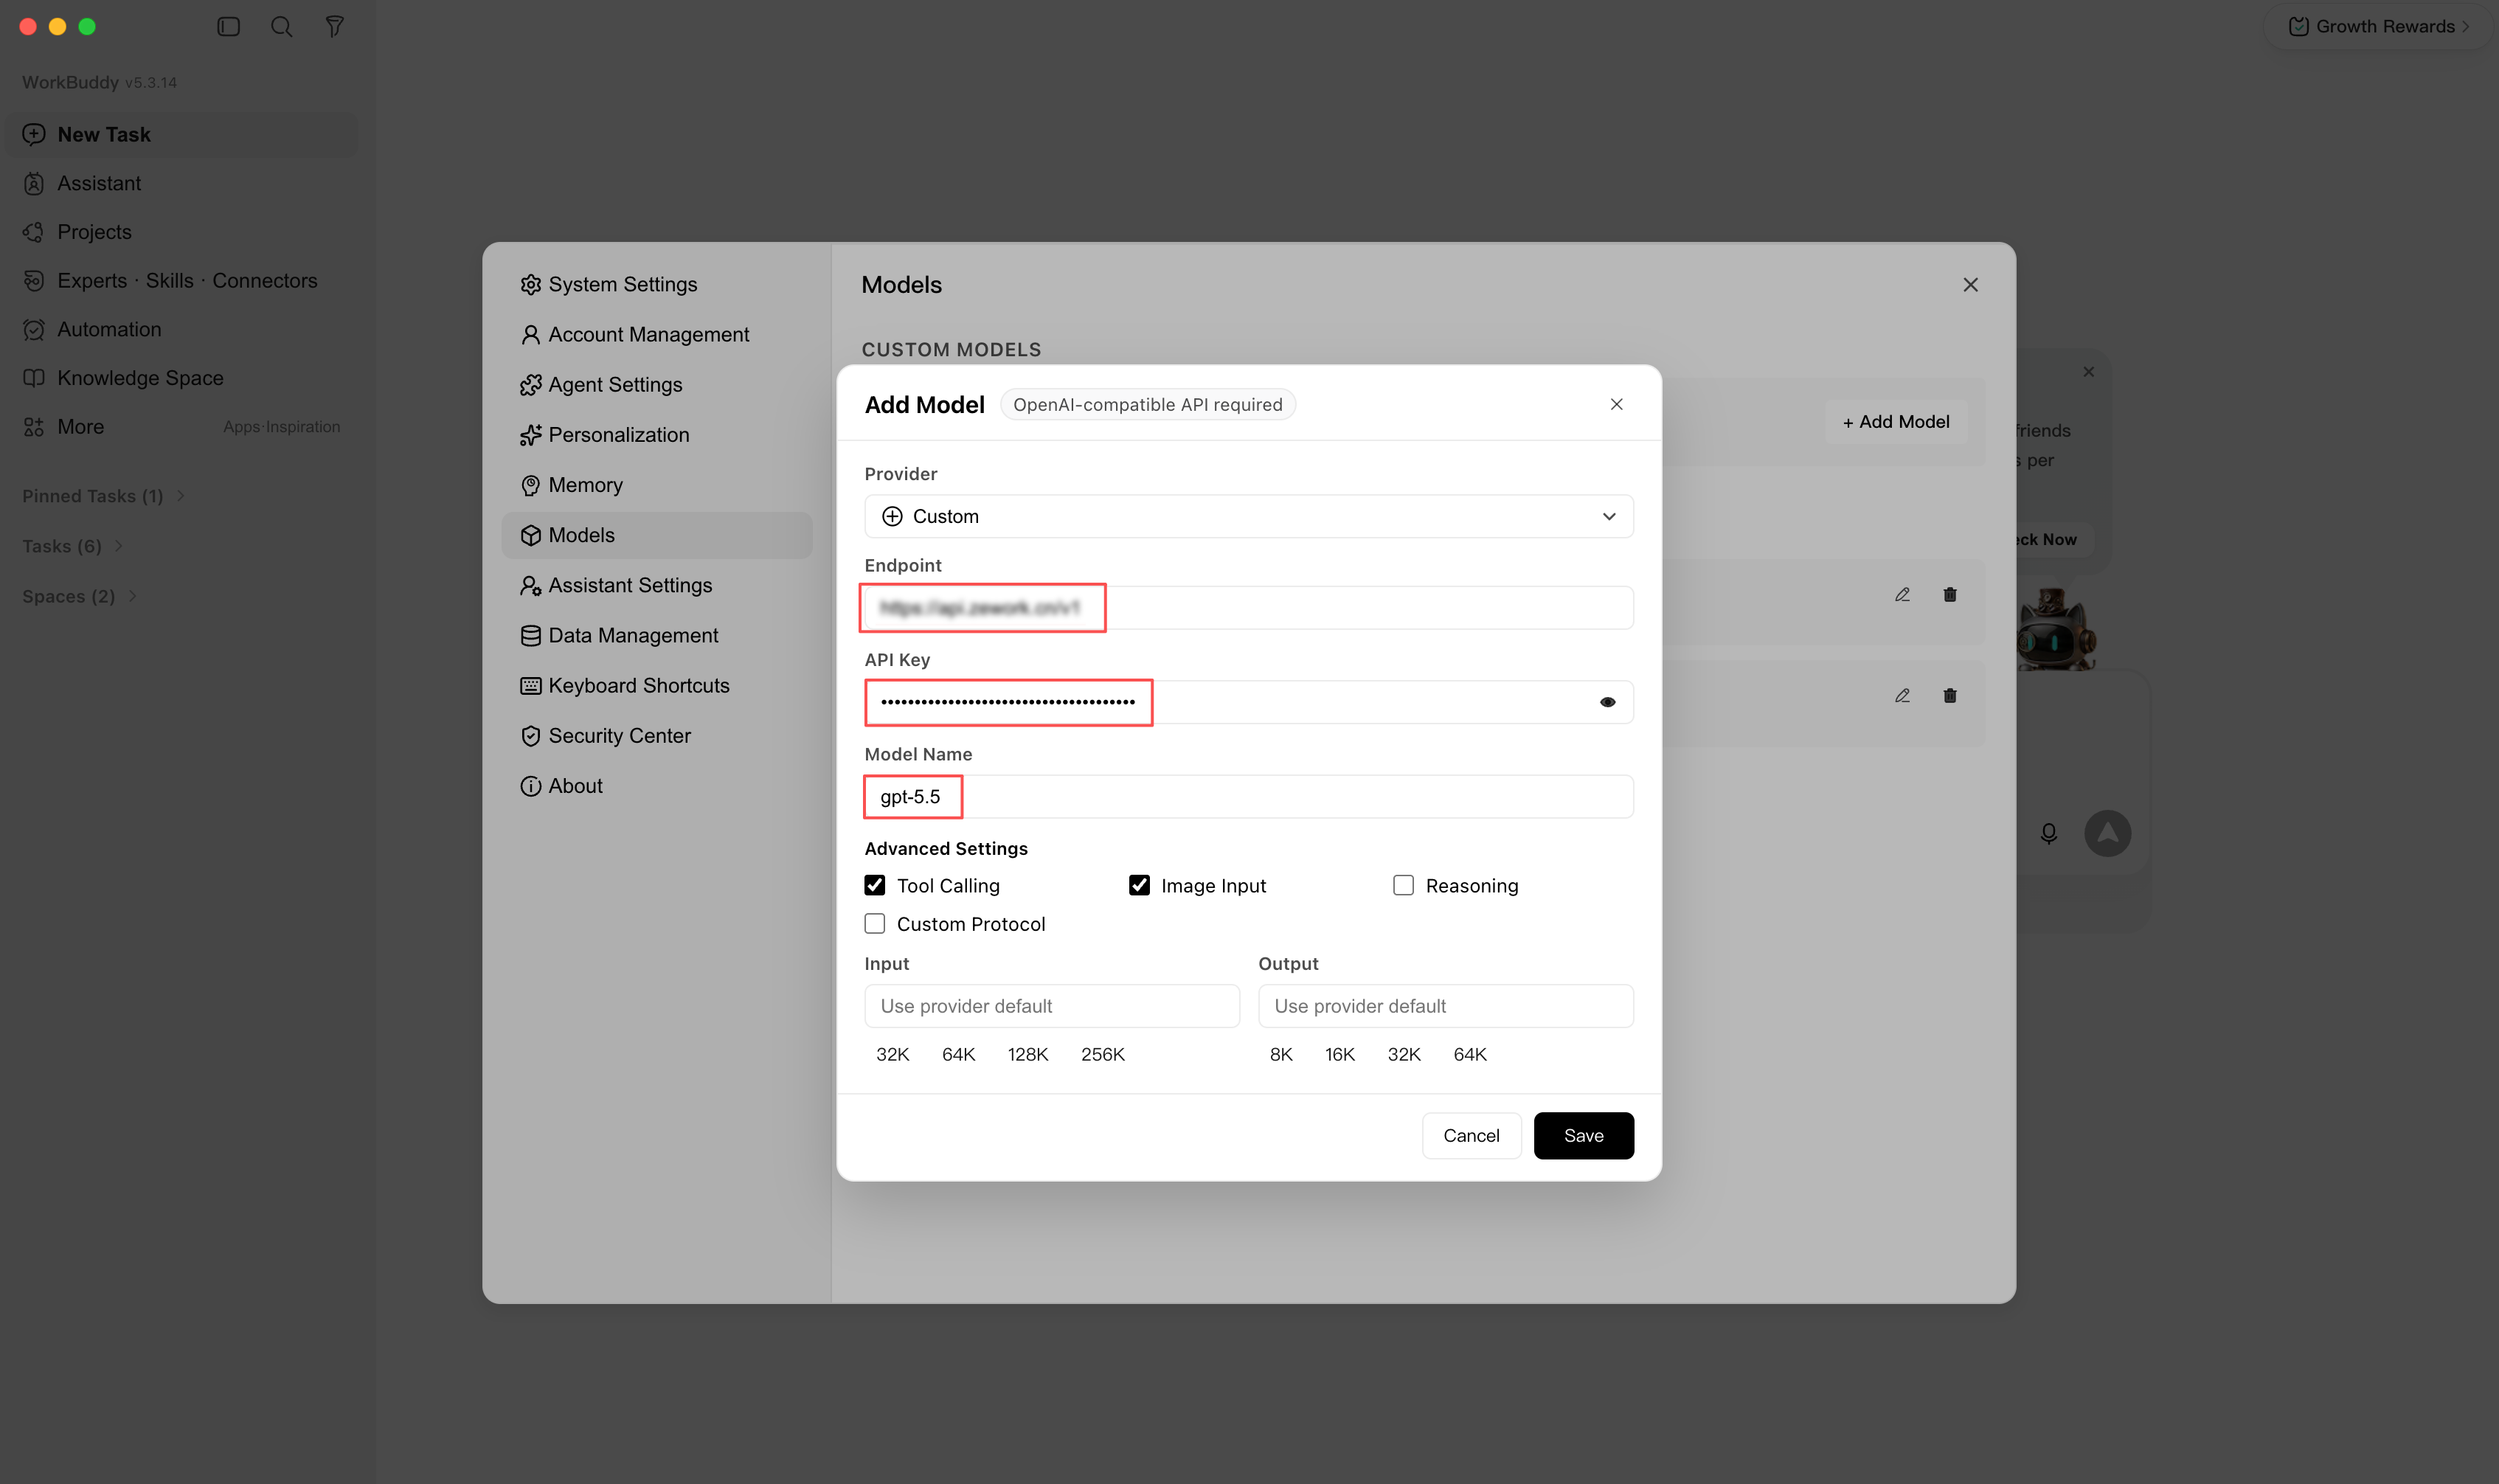
Fill in the form:
- Provider:
Custom / 自定义 - API endpoint:
https://modelsok.com/v1 - API Key: the actual key value from the Models Hub console (not an environment variable name)
- Model name: the model ID from the Models Hub console, e.g.
claude-sonnet-4-6 - Advanced options: tick Tool calling, Image input, Reasoning mode, etc. based on the model's capabilities
Review the values and click Save.
Step 4 — Pick the model and start chatting
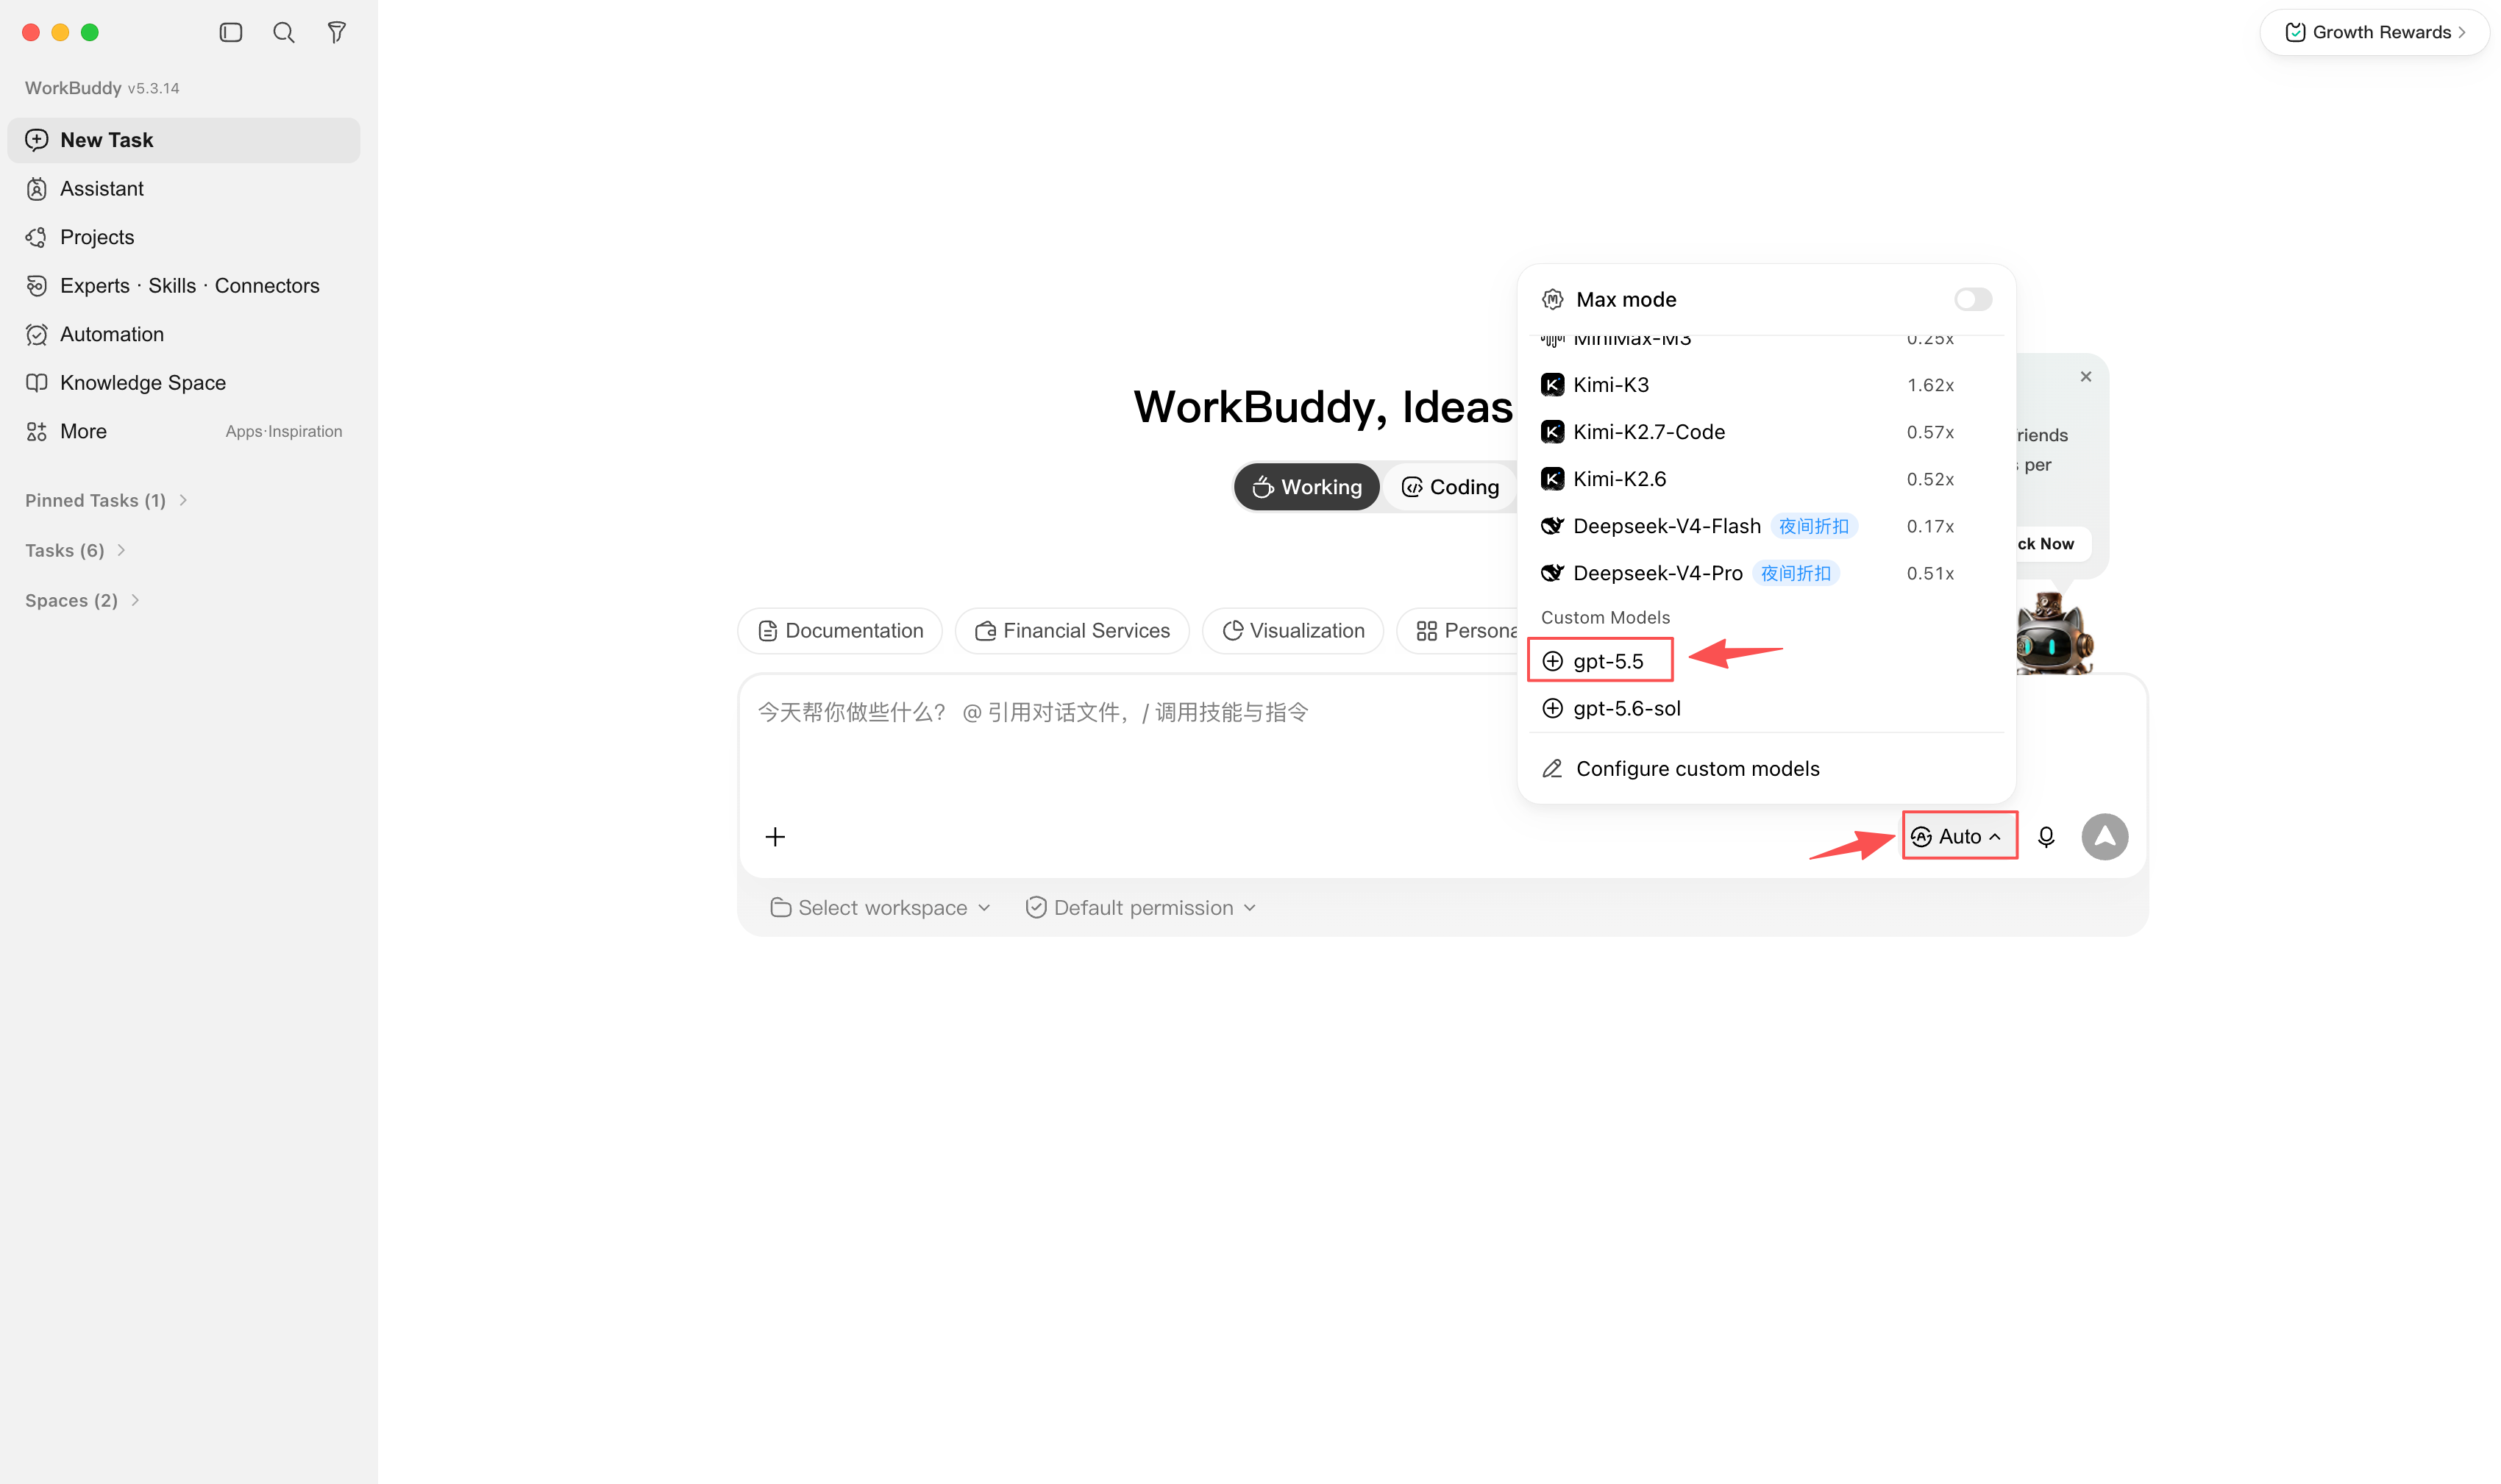
Return to the chat workspace and click the model selector at the bottom-right. Under the Custom models group, pick the Models Hub model you just configured and start your conversation.
Verify
Select the configured model and send a test message, for example "describe this project in one sentence". A normal reply means you're connected. Then open Usage logs in the Models Hub console; a request under your configured model name appears — this confirms the request went through Models Hub and not WorkBuddy's built-in models.
Common errors
| Problem | Solution |
|---|---|
| New model doesn't appear in the picker | Make sure the model name exactly matches the model ID in the Models Hub console and that you clicked Save |
401 / invalid API key | Confirm the API Key field contains the actual key value, not an environment variable name |
| Request fails / returns 404 | Verify the endpoint is https://modelsok.com/v1 and that your network can reach Models Hub |
| Model not found | The model ID must exactly match the one in the Models Hub console (watch case, digits, and hyphens) |
| Output is truncated | Raise maxOutputTokens in the advanced options |
| The Custom models group is empty | Re-save the configuration — WorkBuddy refreshes the custom model list automatically |
More in Troubleshooting.
FAQ
How is it billed? Per input and output token actually consumed, at the price on each model's pricing page; every request is itemized in usage logs.
How is this different from Tencent Cloud's official models? Custom and built-in models live in the same selector without interfering with each other. Custom models go through the Models Hub endpoint and use your Models Hub balance, not your official subscription's model quota.
Can I add more than one Models Hub model? Yes — repeat steps 2 and 3 for each model name. They all show up under the Custom models group and you can switch between them anytime.
Related
- CodeBuddy CLI setup: the terminal version of the same product family, configured via environment variables
- Model pricing and model status
- Cursor setup
Use CodeBuddy CLI with Models Hub: Env Vars and settings.json
Point Tencent Cloud's CodeBuddy CLI at Models Hub's Claude models using CODEBUDDY_BASE_URL and related environment variables or settings.json, with verification and error troubleshooting.
Use Crush with Models Hub: crushrc Custom Provider
Edit Crush's crushrc file and use provider add and model add commands to connect Models Hub's OpenAI-compatible models, with verification and error troubleshooting.